Tuesday, August 17, 2010

Xbox Controller Ports for PC

When I got my first Xbox 1 I also picked up an extra controller breakaway piece, knowing I could use it to make adapters for Xbox>USB. Out of that breakaway cable and a USB extention I was able to make a Xbox cont. to USB adapter, and a USB to Xbox port adapter. That was a long time ago, and both adapters have developed shorts over the years, and both have been rewired.

I decided about a week ago that it's time for a new adapter, and not just one for breakaway-compatible controllers, one for ALL Xbox 1 controllers :D

I've had a busted Xbox in my "for parts" graveyard for a month now (bad power supply), so I pulled these out of it:

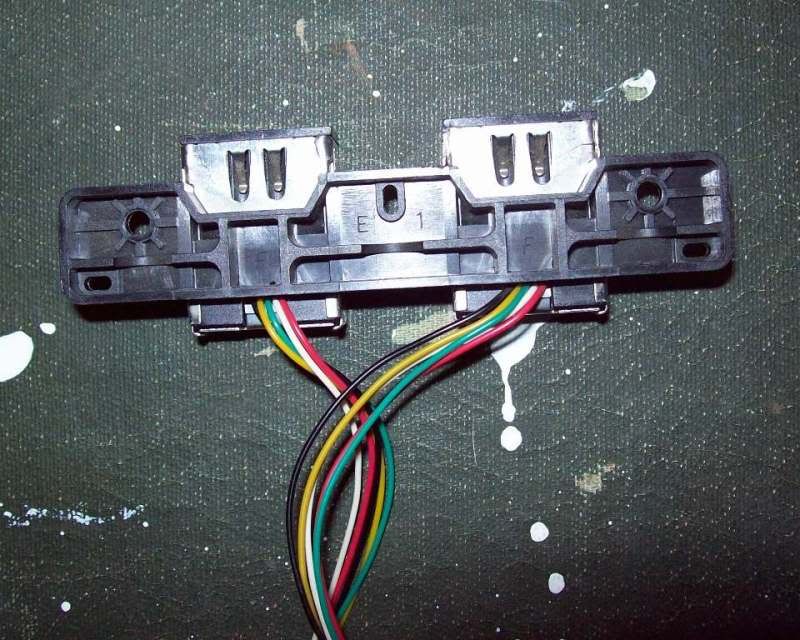
This is controller ports 3 and 4 out of an Xbox 1

Perfect, nice access to wires, works w/ all Xbox controllers since it came out of an Xbox, time to make an adapter out of it :P

My friend had given me 2 USB charge cables for a Sandisk Sansa MP3 player (he was going to throw them out :O), I hacked off the ends and had 2 perfect USB cables for my adapter (I needed 2 cables, there are 2 ports after all ;) ). I wired them up (after some trial and error, I left the original metal ends on the ports wires) and tested it out, it worked great!

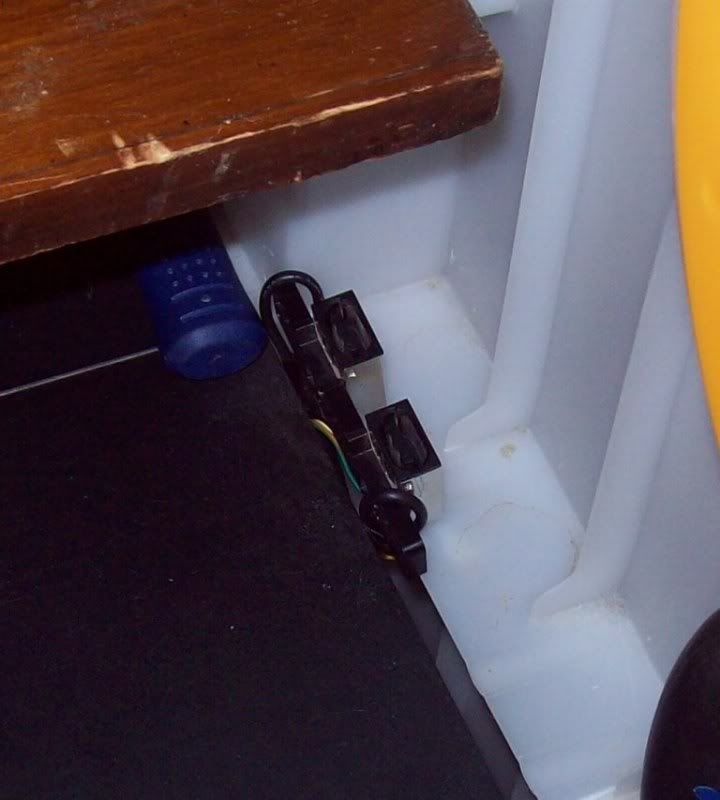
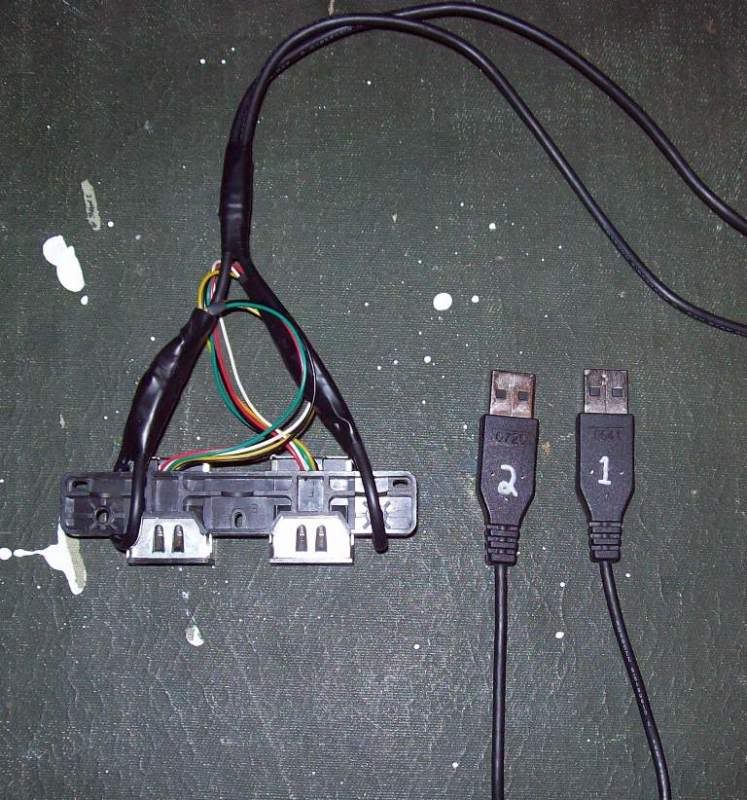
The finished product


I wired it up to the back of my PC and wedged it in a crack of my PC desk, all I have to do is plug in a Xbox controller and go :D

Monday, August 2, 2010

A Gamer Frame

I get free stuff sometimes, most of the time something is wrong with the free stuff (which is why it was free xD). I'm usually able to fix the broken stuff, but sometimes something comes along that isn't worth the effort or is unfixable. Most people would throw things like this away, but me being the pack rat I am, I just can't throw some things away, I use them in different ways ;)

I recently recieved a DMG Gameboy (you know, the big grey brick), it was down right nasty, junk all on it and in it. I opened it up to start the cleaning procedure, and the board looked like it had acid dripped on it, the board was peeling and stained. I decided right then that this is a parts system and threw the boards out.

After getting all of the gunk out of the case, I started to wonder what could I do with a Gameboy that had no innards? Well, there's a window where the screen went, how about a frame?

I wanted the buttons to look like the board was still there, but since the board wasn't there, the buttons would just fall out. My solution was to cut some cardboard to fit and screw it down just like it was the board:


After getting it back together, I noticed it wasn't very stable on it's own, so I made a kickstand. It's designed to snap in where the battery door normally snaps in:


In the picture above, you can also see the picture replacing tool hidden where a battery goes (it's actually a failed attempt at a kickstand, but it works). The picture is sandwiched between the screen guard and casing using 2-sided roll-on tape, to change it, the screen guard has to be removed, below is the easiest way to do it:

^This is the EXT. Connector hole^


Take something like a bent paper clip and insert it until you can touch the back of the picture


And apply pressure, the guard and picture should pop right out xD


After everything, this is what I ended up with:


It was a simple thing to do, but I got nice results from it :)